The problem is corrosion…..
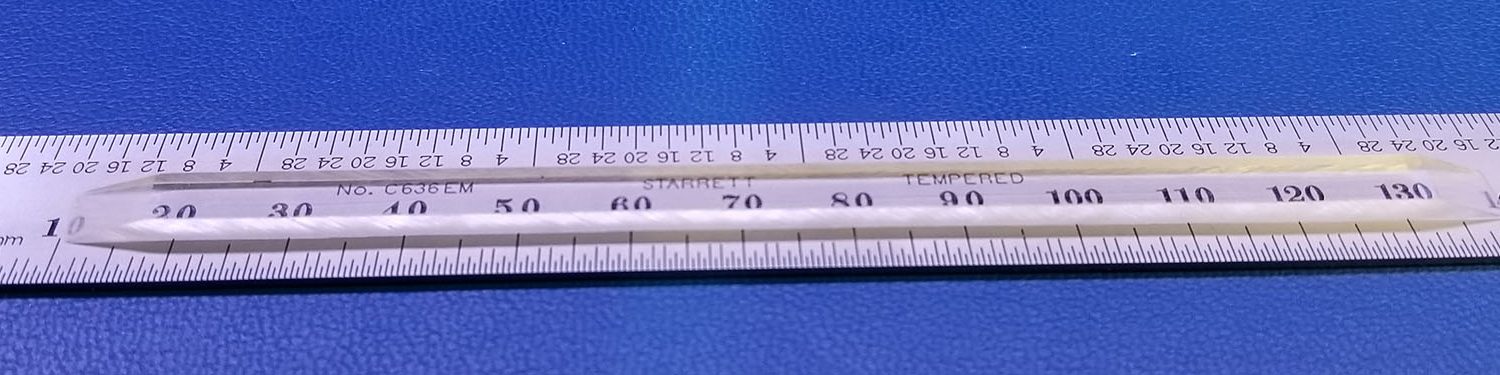
Corrosion appears to be happening either directly under or nearby the various sized (but typically 5″ long) plastic runners that line the bottom of the large PCB modules. These plastic runners protect the small surface mounted components on the bottom board from being scraped off when being inserted. Due to the proximity of the modules, with the install order being from BOTTOM to TOP, the front-panel connector edge of the module below it can scrape and accidentally yank off a small SMD part.
The links mentioning the problem can be found here because I have no first-hand examples:
- an EEVBLOG discussion regarding this issue.
- Alexandre’s Souza’s blog post on this topic. Use google translate for portuguese.
- and his youtube video.
Despite checking a half dozen modules, I have yet to see the problem first hand. MarkL from EEVBLOG saw it on many of his (25) cards, and Alexandre is certainly seeing it galore. I’m not exactly sure what’s different. Is it environmental? Date specific (doesn’t appear to be so), module specific (also doesn’t appear to be so)?
The purpose of this post is to draw awareness in the HP test equipment community to at least check your boards for signs of corrosion with the hopes of catching it early. There *is* a risk to damaging your board when removing the runners. So please be careful, take your time, and be prudent.
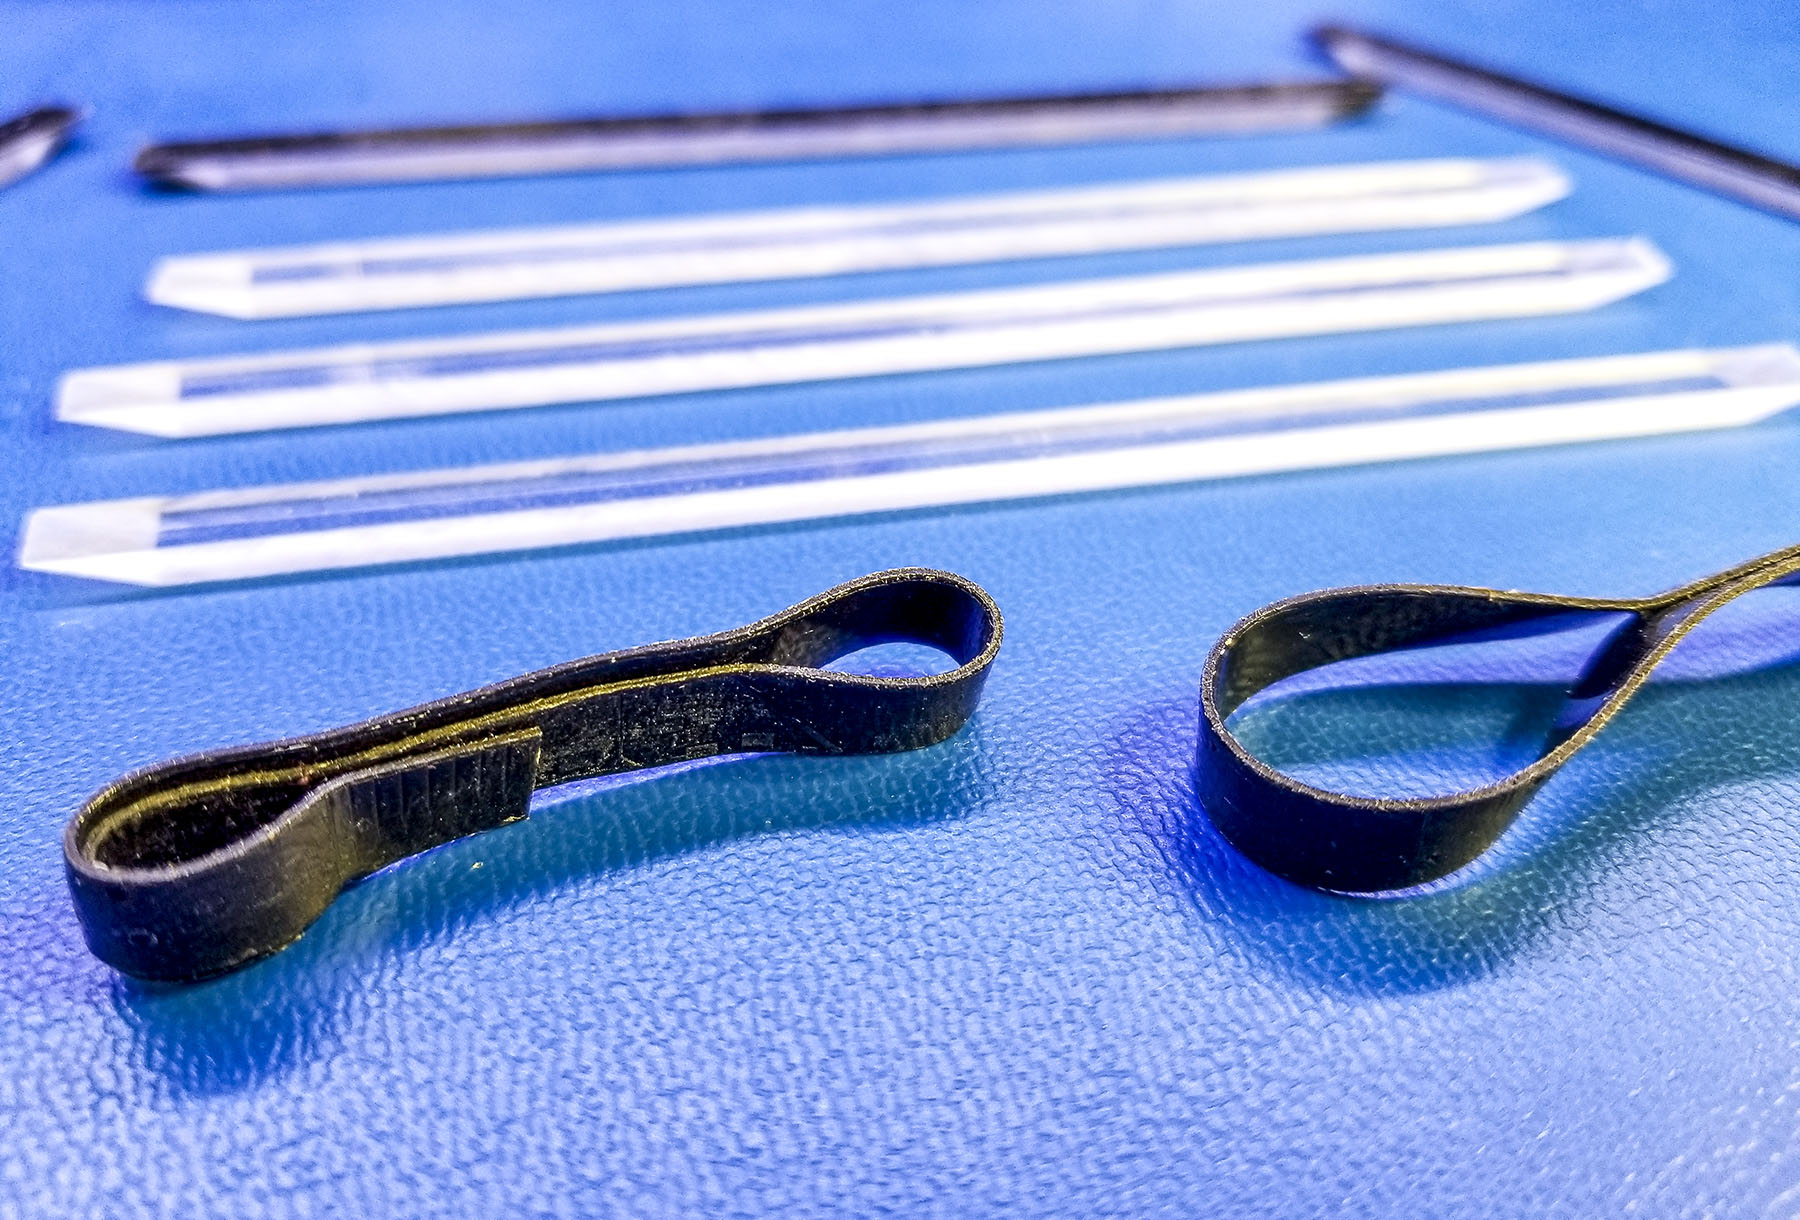
Runners with their adhesive tape removed. Notice all in one piece and still sticky/flexible.
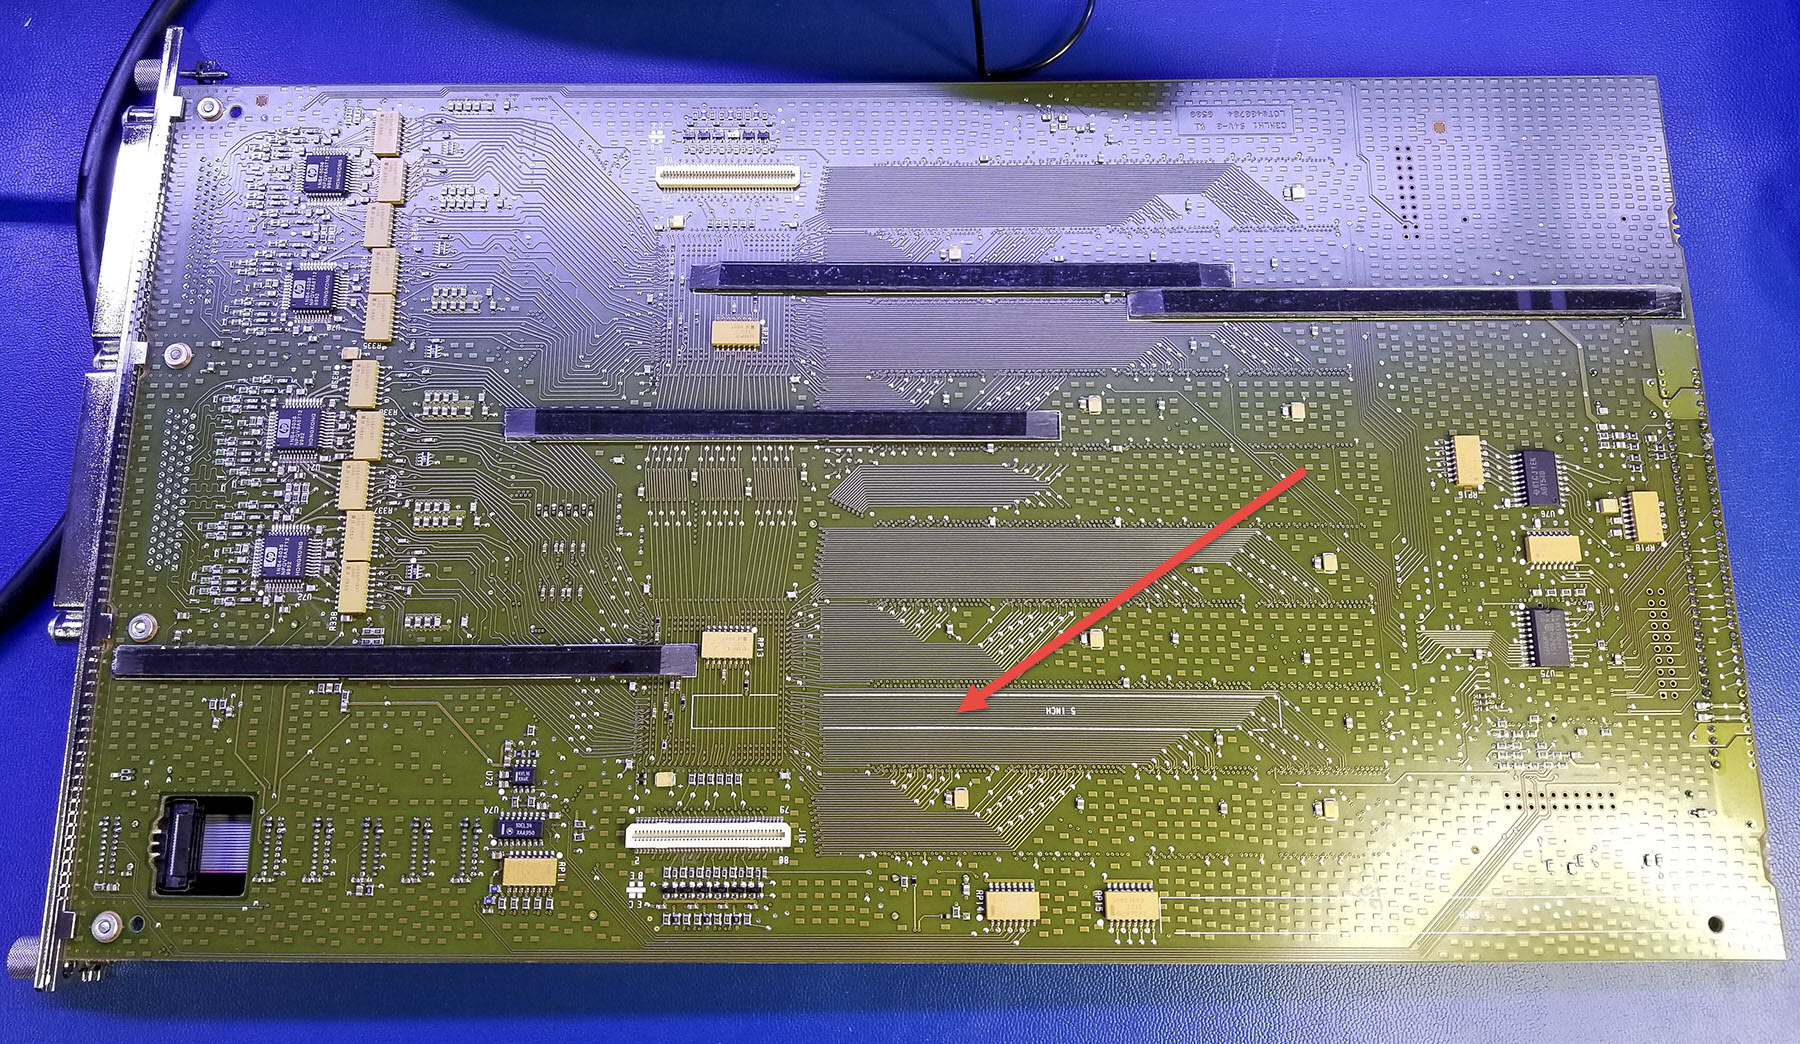
Here’s a board with the bottom right runner removed. The other four black runners are also present. The red arrow points to the missing area…..
The method of removal is…..
- Heat the runners using a heat gun. I use a 350w heatgun on low. Using multiple passes across the whole strip. While others have suggested 100-150C, I’ve noticed that getting temperatures up around 60C +/- seem enough to start taking effect.
- I use a plastic pry tool designed for opening iphones, video game consoles, etc. Sometimes these are called spudgers.
- Slowly pry one end, preferably the end with less dense traces underneath. As you’re prying, try to get your plastic scraper, or spudger, underneath both the black adhesive tape and the plastic runner. This makes for a considerably easier removal. Some people have reported that the adhesive tape is hard, and more stuck to the PCB than the runner. I’ve found my adhesive to still be pliable, stretching a bit on removal. YMMV.
- If you’ve found you’ve got both the tape and the adhesive off, congratulations, just take some Isopropyl (I use 99%) and a soft bristle brush and clear the entire section under the runner.
- If you’re having trouble, then using a plastic scraper, use IPA. Some suggest mixing acetone in a 50/50 ratio with lower, say 70% IPA. This should keep it liquid a little more longer. Most are suggesting flushing the area with water afterwards, and then heating the boards slightly to evaporate the water.
- What I’ve been doing, and who knows if this is right or not, is to scrub it with 99% IPA, then use a lint-free cloth to remove any solids, and then my 3M 497M. Yes it’s expensive, but trust me it’s awesome. I’d probably buy from a better official reseller. This sucks the remaining moisture and solids off the board.
Research on the adhesive tape replacements
- I’ve contacted 3M and traded messages with an application engineer.
- Some of the sources I linked above indicate that the adhesive is causing the problem directly — that some part of the adhesive is breaking down and then causing corrosion directly. I don’t believe this is likely. I think that either the adhesive tape is attracting moisture, trapping moisture, or trapping a corrosive substance like flux residue during manufacturing. Between the adhesive tape and the PCB.
- 3M said that while they haven’t done extensive electrical PCB tests with their VHB tapes, they do not believe that their tapes would behave that way citing long term use in “hundreds of thousands” of applications without a known related issue. Their VHB tapes are not intended to be removed, however!
- I don’t think we know which tape was used, but the VHB tapes are definitely possibilities…..
- 3M thinks that the 5952-series, specifically the 5915 would be the appropriate replacement for the application. This is after extensive information sharing and questions.
- Some have suggested using CC after completely removing and cleaning the PCB.
- 3M said that the VHB acrylic tapes WILL NOT BOND to a conformal coating.
- If you use conformal coating to prevent a similar problem from happening in the future, then the recommendation is a 3M 830 series, the 442KW. This has a huge advantage of being completely removable unlike the VHB. And, of course, more importantly will bond with the CC.
- Last but not least, I think the idea of using a double-sided polyimide would work here. I doubt that this would have enough sticky-power(TM).
Summary
Whether this is or isn’t an actual problem that you’re going to face depends on a large number of factors, not the least of which is the environmental conditions in which the modules that you’ve bought have lived in. It’s possible that there are manufacturing related problems, like flux residue being trapped underneath the adhesive tape. There is a bit of a risk and reward scenario here, and I’m sorry to say that I don’t have a concrete recommendation. I’ve searched a half dozen modules without any sign of corrosion. I DO think that once you’ve removed the sliders that you should replace them. I’ve had a couple close calls with removing/reinstalling modules. I also think that the 442KW should be used(current advice Dec 2019), albeit more sparingly in only less trace-dense areas.
I think it’s also useful to note that the later modules for the 169xx series used smaller sliders that are both shorter and thinner. This minimizes the PCB contact area, and so perhaps Agilent had learned something from previous years……
Update June 2020 and current advice
- The 3M 5915 is too permanent, sticky, and doesn’t bond to silicone. The 3M 442KW seems perfect!
- I’m using conformal coating over any runner areas which have traces, exposed test pads, nearby components, etc)
I ended up buying some 3M 442KW from Uline. Uline was one of the limited resellers online that actually responded to my queries quickly and with authority. This tape has a limited shelf life of around 12 months. I wanted to know, before I plonked down my hard earned cash, what their stock manufacturing date was. Not only did they respond with a newish date (Mid-Feb for a end of May order), but they were willing to send a certificate of compliance listing lot number, the date, and some other information. While for an individual hobbyist this type of paperwork may not seem useful, it means they stand behind what they told me. I trust them based on their response.
The 442KW is a different type of tape than the previously mentioned 5915. The 5915 is an acrylic foam based tape. This tape won’t bond with silicone conformal coating and because I’ve decided to use CC, then the 5915 is basically out. The 442KW is a polyester film tape with a rubber adhesive. It will bond with CC, but as mentioned above, has clean removability from most surfaces. The actual adhesive is very very thin, but so far I really like it. It grabs good initially, but you can still lift and replace it.
Overall strategy for replacement
- Ensure the runner area is clean of any old adhesive.
- Clean the area with 99% IPA.
- Inspect for any damage, and repair as necessary. (This is a whole other topic that I won’t address here, and honestly don’t know much about when we’re talking about 5 mil traces)
- Apply silicone conformal coating over any exposed test pads, traces, components near the runners. I use MG Chemicals 422B liquid with a brush. Dry 10 mins before handling, 48 hours for full cure.
- Ensure all the runners are clean.
- Place tape upside down, stick the runners on the tape. You need about 20 linear inches of 1/2″ tape to do all the runners on an individual 16910 board. You’ll need more for 167xx — closer to 30-36 inches per card, depending. It does vary slightly per card type.
- Using an X-ACTO knife, trim the tape.
- Replace the runners in the right size spots, ensuring you use firm pressure to activate the adhesive.
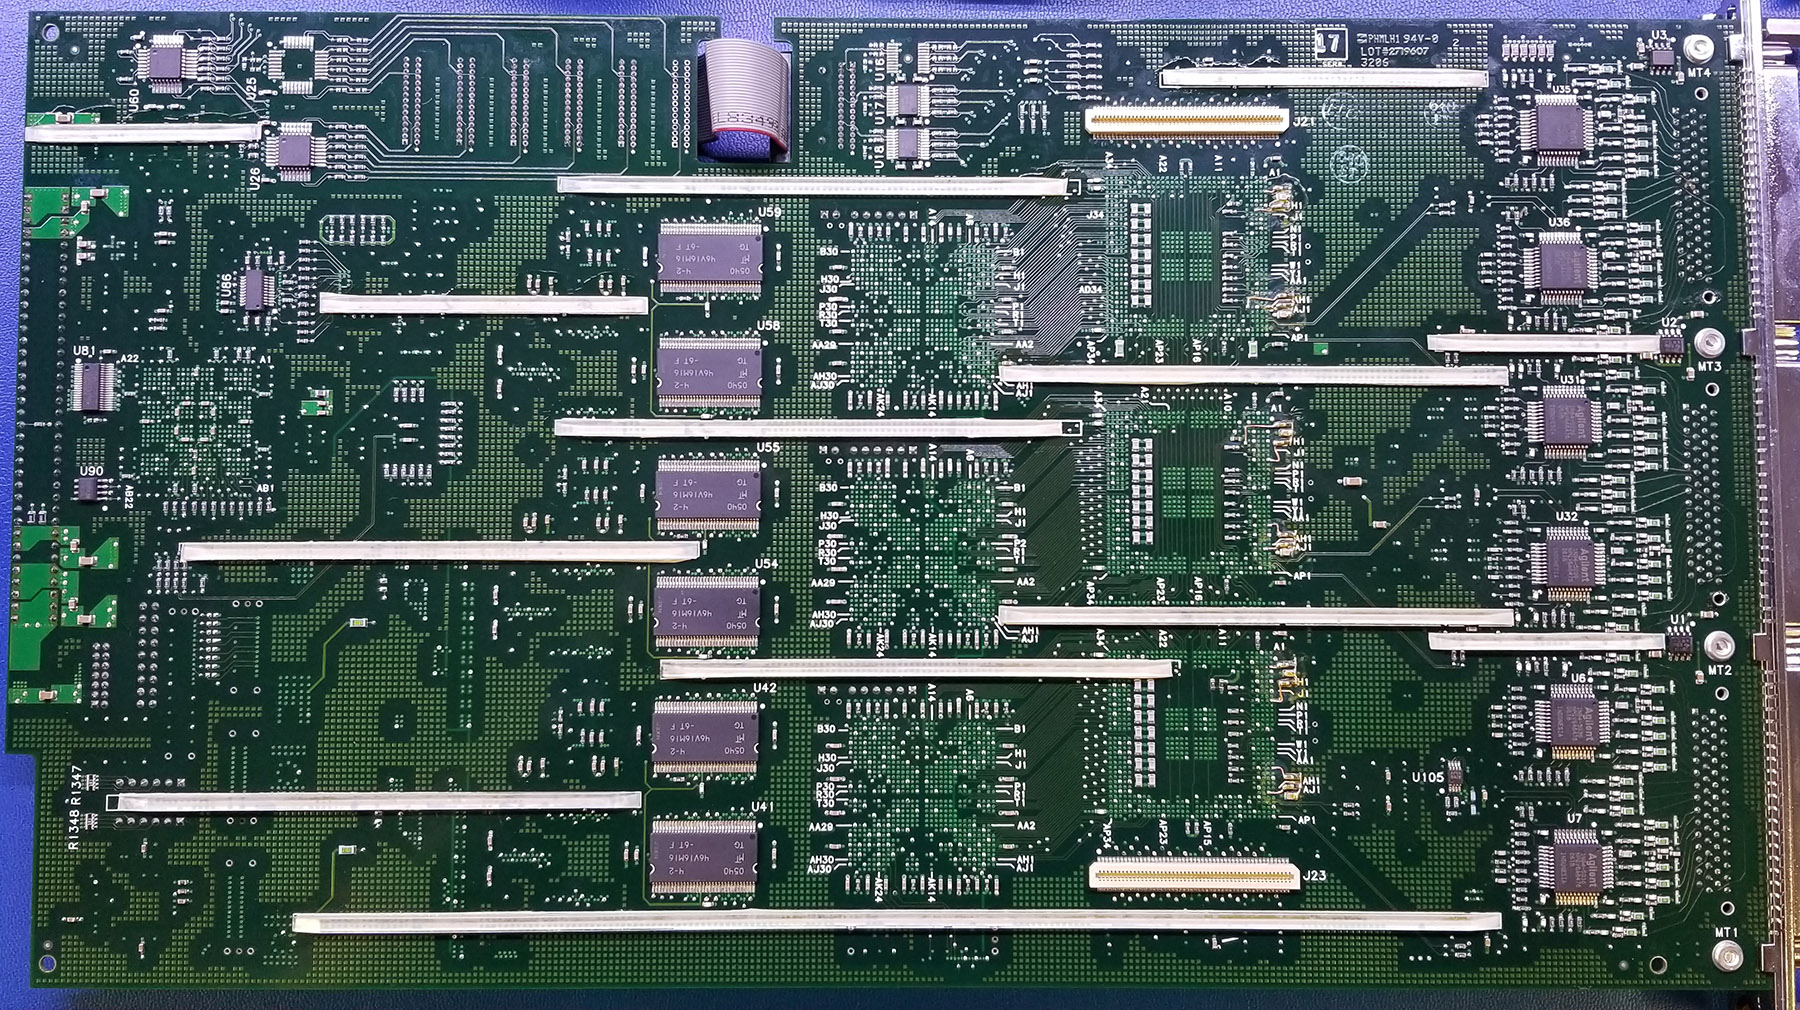
Here’s a recently redone board — I do love the new white instead of the black. Looks clean!
I would love your constructive feedback in the comment section below.
Add comment