Goal: Replace the loud 45dbA Panaflo side panel fan on an HP 16700A Logic Analyzer with two new Noctua fans.
While I love my HP 16700A Logic Analyzer for a multitude of reasons, it sounded like a jet engine when it was powered up. The main culprit of the noise came from the single Panaflo side panel fan that is located on the right side of the unit, when viewed from the back (aka important) side of the unit. A quick google of the fans show the critical specs of the Panaflo FBA12G12U to be:
- 120mm 12V fan
- Air flow at 114.7 CFM
- 2750 RPM
- 45.5dbA noise
Following David Partridge’s advice from the HP Agilent Equipment Yahoo groups, and double-checking all the specs myself, I ordered (2) Noctua NF-S12A FLX from Amazon for about $20 each.
These fans are rated at:
- Air Flow at 107 m3h (or 63.27 CFM each) giving me 2*63.27=126.54 CFM total
- 1200 RPM
- 17.8dbA noise
Now, you’d think that since there are two fans, you’d just double the noise figure, but it turns out that sound doesn’t actually work that way. I found a post here at Silent PC Review that discusses noise related to fans, including actual measurements of two fans side by side. It seems the standard rule is add +3db with a second identical fan. This puts me at around 21dbA which is much less than the original.
My guide for installing these fans was common sense and roughly the official HP Service guide for the HP 16700A available for free on HP’s site. The rough procedure is:
- Remove the feet using a Torx T-10 screwdriver.
- Remove the handle on the side, using a Torx T-20 screwdriver.
- Remove the three case screws on the back using a Torx T-15 screwdriver. (see picture below)
- Remove the existing Panaflo fan with a phillips head screwdriver.
- Replace the fan with the two new ones.
- Reconnect the fan connector.
- Reverse steps 3-1.
Let’s look at some pictures!
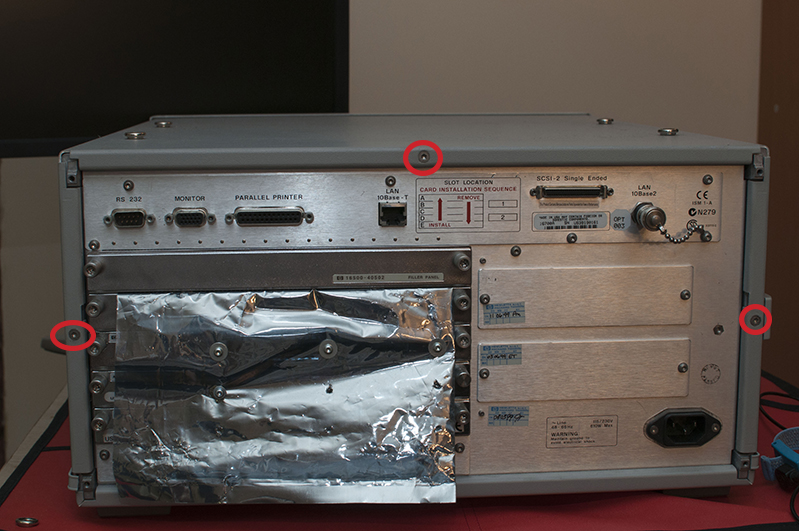 Here we see the unit and the location of the case screws. You’ll want to remove the handle on the side first, before taking these off.
I want to add that you should be careful putting this cover back on. Make sure that the bottom of the top cover is sitting neatly in place. It’s easy to either miss getting it seated right or miss getting it fully inserted into the front cover.
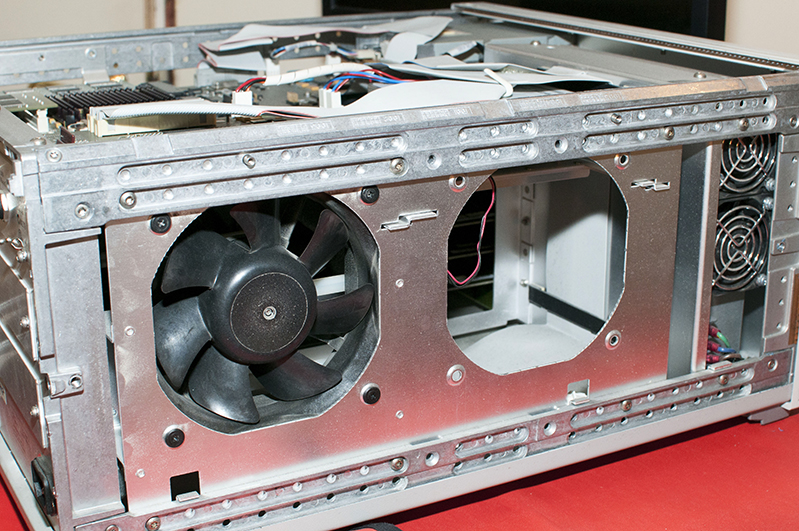
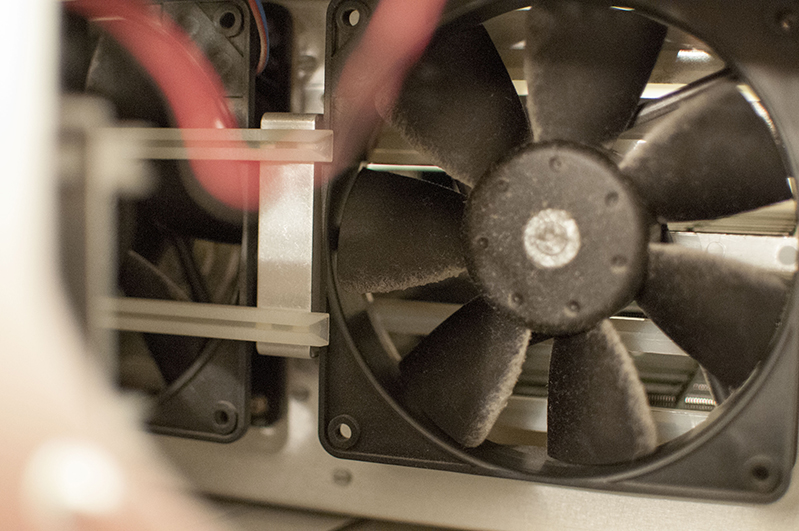
To the right, we see the case has now been removed, and we see the single Panaflo fan on the left hand side. We can also see the secondary mounting holes for another fan.
UPDATE: Glen Slick has a comment below that talks about the reason for this.
Below, we see a view of the original fan from the top.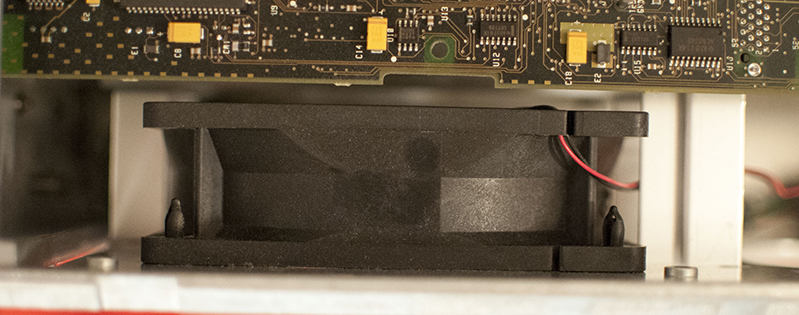
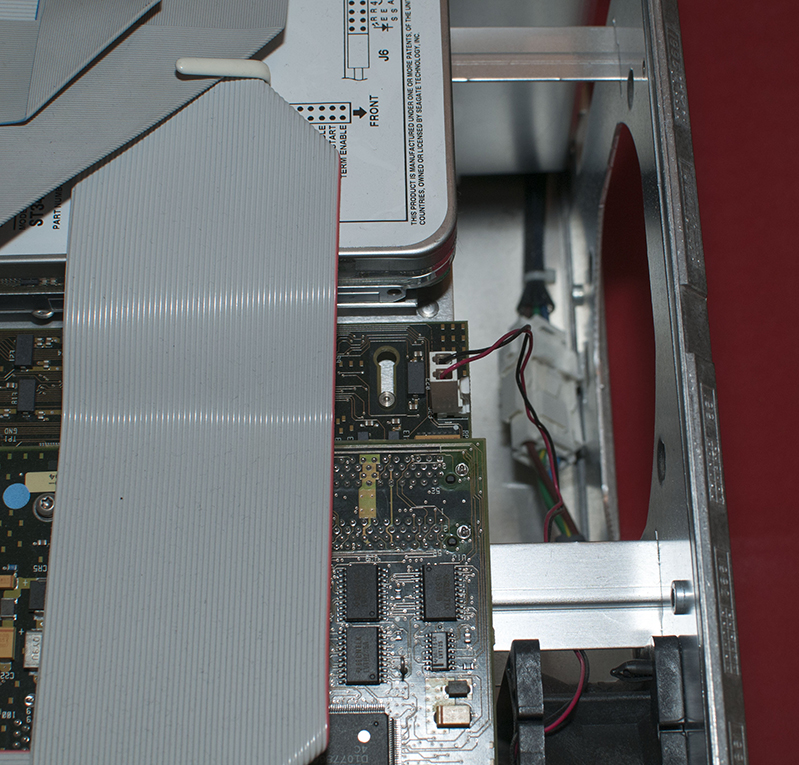
To the right, we see the fan connector to the main board in the center of the image.
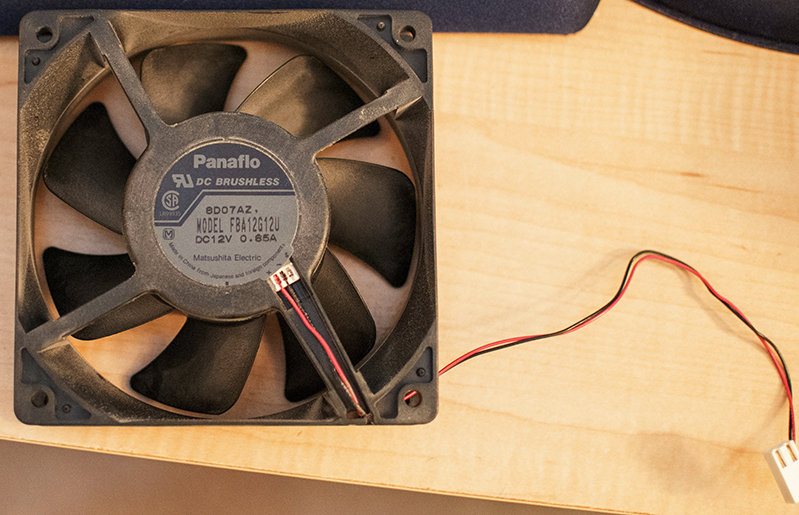 To the left, we have the original fan that has been removed.
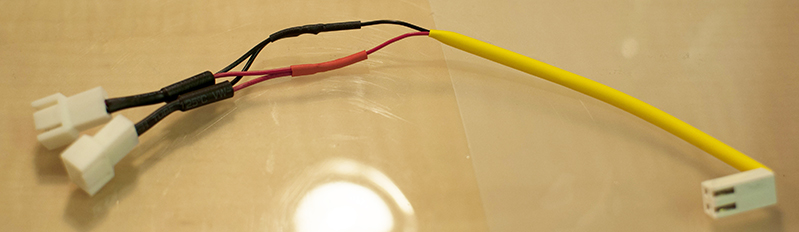
Next, I needed to create adapter that connects the existing fan connector with two connectors compatible with the Noctua’s. While I could have created an overall smaller length cable and adapter, it was important to me to be able to swap out fans in the future in the event of failures or problems. The Noctua’s are rated for 150,000 hours MTBF, and have a 6-year warranty — so I’m not particularly worried about this, but I think this was the best way to not violate the original fan, and still provide solid connectivity. I’m very happy with the results of my work.
I really can’t say enough about these Noctua fans. They are really high quality, include a ton of different adapters, have silicon mounts, silicon screws, and I really like them.
Especially given my goal, these are perfect for the application!

 |
|
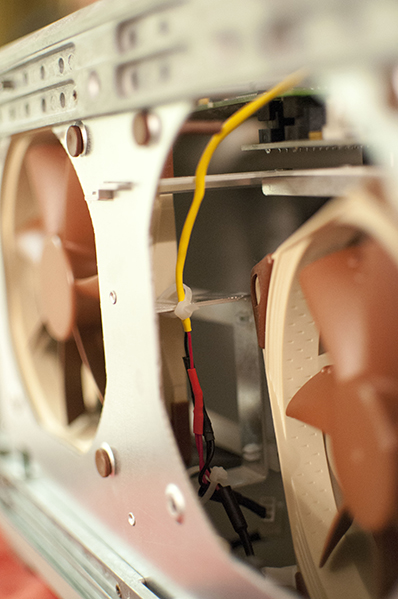
Cable management was tricky with this unit with my new adapters, and I needed to make sure that there was complete unimpeded path of the fans. What I did was zip tie the cables to the section between the two fans, and I think this will do a good job. The cables are mostly UNDER the two fans, and I think this will do the trick!
 To left you’ll see the two new fans fitted into the unit. The observant reader will notice that the bottom left hand corner screw of each of the fans are metal screws, and not the silicon type used elsewhere. I had no easy access to be able to pull through the silicon screws at those locations. I don’t know (and honestly don’t care) if this affects my overall goal. I was not going to spend more time on disassembly for these two small screws!
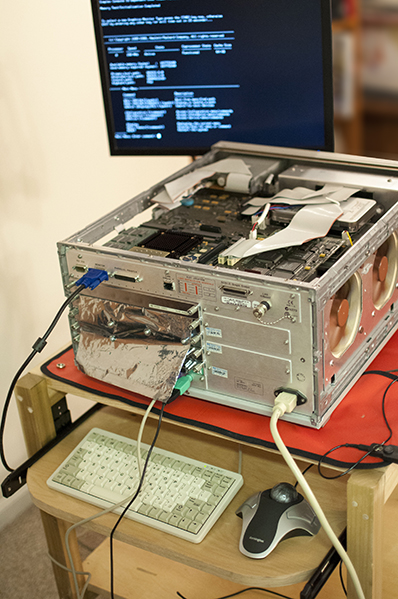
Here’s the finished product with the machine booted up!
This project went very smoothly for me, and I was happy that I didn’t run into any major snags during it.
So, did I achieve my goal? DEFINITELY!
These new fans are INCREDIBLY QUIET. I’m not an acoustic engineer, but when I put my ear up to the fans, there is barely any audible noise coming from them at all. I hear wind blowing, but it’s very quiet. These fans are rated at 17.8db, but I can’t imagine something being twice as quiet. They are really quiet!
The interesting thing about noise, is that now that I no longer hear the noise from these fans, other noises of the unit become much more apparent. For instance, the power supply fans are now EASILY the loudest noise coming from the unit. The so-called “Center Strut” fans, which are the Papst 4412FM fans (see image here) don’t seem as loud or noticable.
The hard drive is a little noisy, but not too bad.
The power supply fans might be a good project for me to take on. For being so damn small, they are sure are noisy!
Please feel free to comment below on my project. I love to have feedback, good or bad, but always constructive! 🙂
I was doing this project anyways, so I figured I’d document and share my results!
Thanks to David Partridge and the rest of the folks at HP Agilent Equipment yahoo group for feedback and catching the fact that I originally ordered the much-smaller-flow Noctua ULN fans by mistake. I missed the fact that their fans are rated in M3H, instead of CFM….
A link to my cart that I built for the Logic Analyzer can seen here. I’ve since replaced the keyboard and added a trackball as can be seen here.
“We can also see the secondary mounting holes for another fan. There’s a documented reason for why the second fan wasn’t fitted, but I’m honestly not interested in researching it, but it has something to do with some other associated module not fitting properly whenever both fans are installed.”
The original 16700A only had two fans mounted on the side and no center strut mounted fans. That apparently did not provide sufficient cooling for newer logic analyzer modules and newer 16700A were switched to a three fan design with two mounted on the center strut and only one mounted on the side.
———-
1670xA: How do I know if I need to get the 3-fan upgrade for the new deep memory modules?
The 3-fan upgrade is required if the serial number of your 16700A,16701A or 16702A is in the series US00000000 to US38490155 and you are installing a 16715A, 16716A, 16717A,16718A or 16719A.
Service Notes 16700A-02, 16701A-01 and 16702A-03 contain more details.
The part number of the 3-fan kit for the 16700A and 16702A is 16700-68711.
The part number of the 3-fan kit for the 16701A is 16701-68703.
It must be installed by Agilent qualified personnel.
Revision 1.0 28 Dec 99 ell
[…] See my fan upgrade post here on quieting those noisy fans. […]
Hi Keith,
Nice article! One note: when you refer to noise power, adding 3dB is indeed doubling the power in linear units. Also, https://www.noisehelp.com/noise-level-chart.html has real life references for dBA levels.
Cheers,
Jose Carmo